I have long considered writing up tutorials.. but I have never actually done one.. so I thought, why not start with something simple, like a Kumihimo tutorial? Here is a tutorial step by step of the basic 10 warp flat kumihimo wrap bracelet pictured here. In this one I used 3 warps of coloured hemp, and 7 warps of thin ribbon.

If you have one of the foam disks, this should be fairly easy to follow, as I will use both pictorial instruction, and written instructions, with the number and lowercase/uppercase scheme from the disk. I also use a lead weight with a wire hook, and hook it on the loop hanging out of the hole (and why there is a loop is because I cut my strings in pairs, and then fold them over and tie) as a way to keep even tension on the braid.

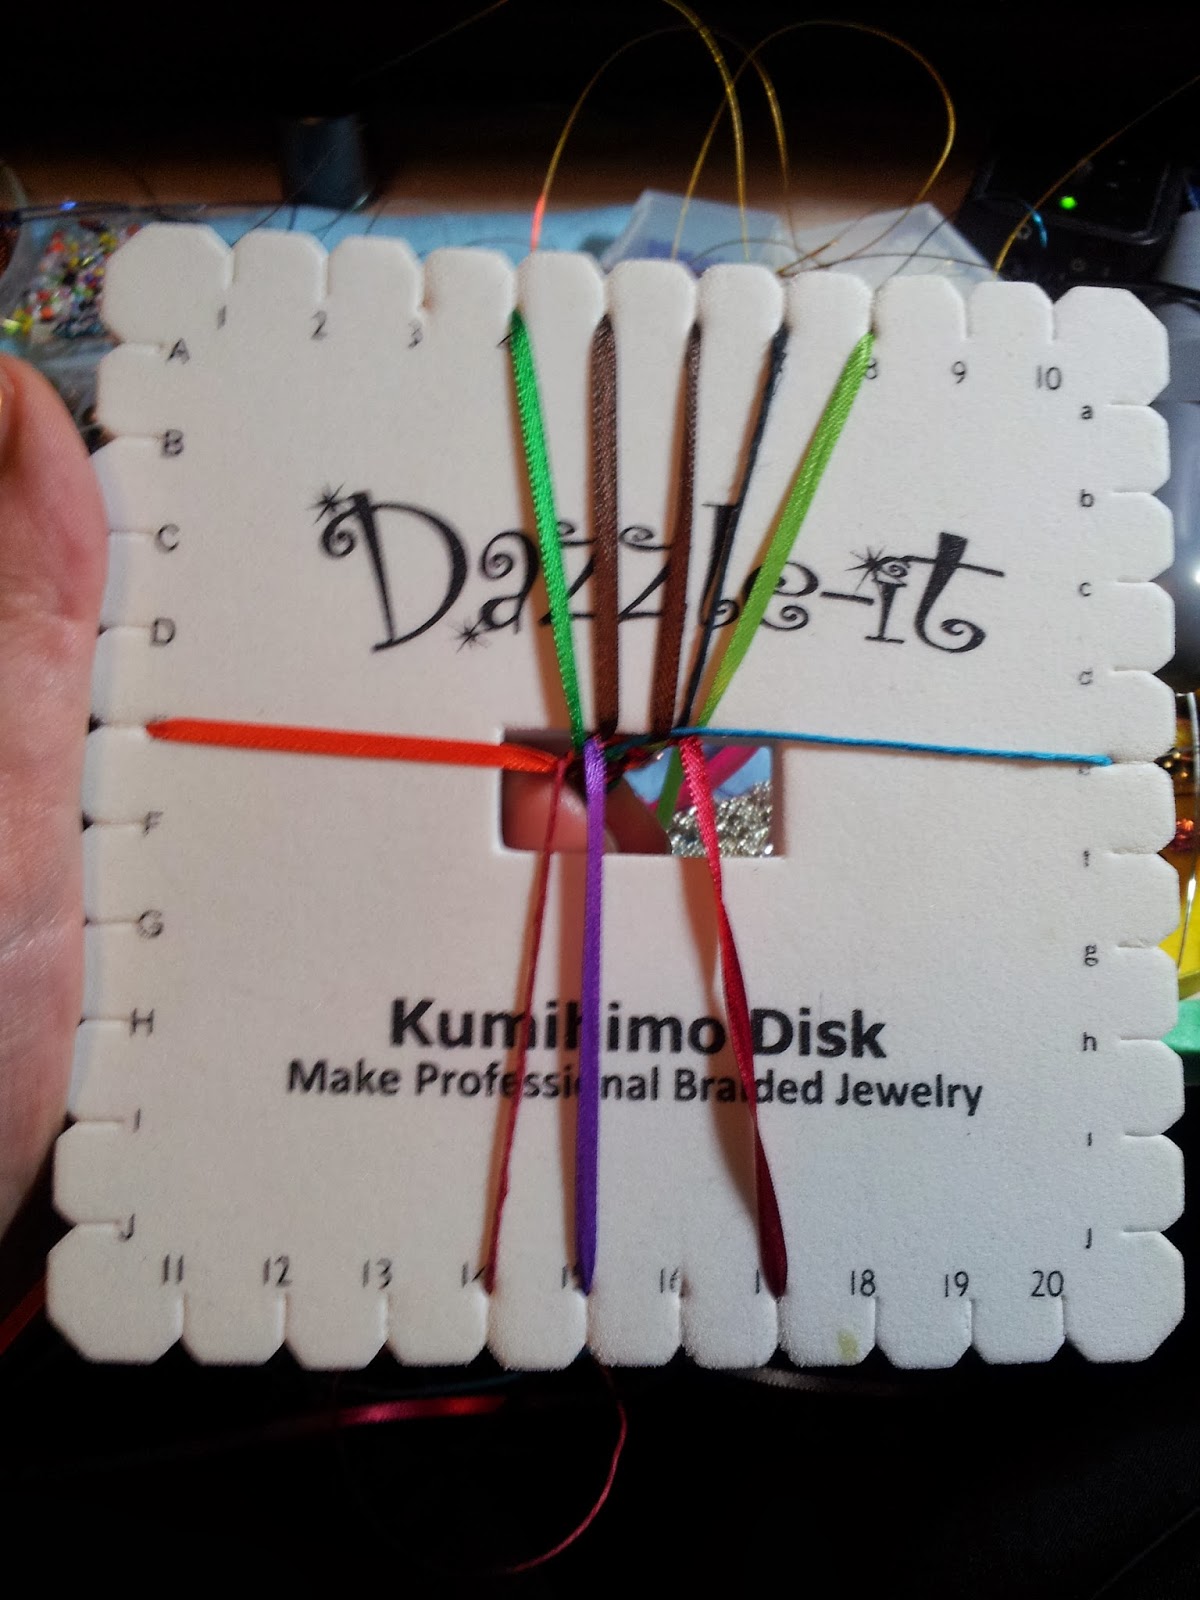
First you load your flat disk like this.. 6 warps from #3 to #8, and 4 warps on #14 through #17


The next step is to take the warp from #5, and move it to e
Then you take the warp from #6, and move it to E. You will see that there is now 4 on the top, and 4 on the bottom.
If you look closely at the warps in the hole, you will see that they are crossing. This is important if you want one solid braid. If you do this backwards, you will end up with two smaller braids, not connected. (I do this to create a buttonhole in my work, for the clasp, crossing the warps again to end the buttonhole.) I find it easiest to think of it as left side and right side at this point, because you do your warp movements first on the left, and then on the right.


Left side! You take #15, and move it up to #5
Then you move #4 down to #15


Next is #14 moving up to #4
And #3 moves down to #14 (look, we have 4 across the bottom again!)
Now that we have done the left side, we start on the right side.


#16 moves up to #6
#7 moves down to #16


and #17 moves up to #7
Then #8 moves down to #17
There we go! back to 4 on the top, and 4 on the bottom! But wait, we started with 6 on the top, and 4 on the bottom...


So you take e and move it up to #8
And E and move it up to #3, and voila! We are back to 6 across the top, and 4 across the the bottom! To make the flat braid flat, you need even tension as you are weaving, and to repeat the steps. Each set of steps that you do will make one more level of the braid.

This is what the braid looks like after a few passes around the disk. Despite even tension, it is still a little wobbly, because of the fact that the hemp thread is thinner than the ribbon.
I love braiding, I hope that this was helpful to someone!
B

If you have one of the foam disks, this should be fairly easy to follow, as I will use both pictorial instruction, and written instructions, with the number and lowercase/uppercase scheme from the disk. I also use a lead weight with a wire hook, and hook it on the loop hanging out of the hole (and why there is a loop is because I cut my strings in pairs, and then fold them over and tie) as a way to keep even tension on the braid.

First you load your flat disk like this.. 6 warps from #3 to #8, and 4 warps on #14 through #17


The next step is to take the warp from #5, and move it to e
Then you take the warp from #6, and move it to E. You will see that there is now 4 on the top, and 4 on the bottom.
If you look closely at the warps in the hole, you will see that they are crossing. This is important if you want one solid braid. If you do this backwards, you will end up with two smaller braids, not connected. (I do this to create a buttonhole in my work, for the clasp, crossing the warps again to end the buttonhole.) I find it easiest to think of it as left side and right side at this point, because you do your warp movements first on the left, and then on the right.


Left side! You take #15, and move it up to #5
Then you move #4 down to #15


Next is #14 moving up to #4
And #3 moves down to #14 (look, we have 4 across the bottom again!)
Now that we have done the left side, we start on the right side.

#16 moves up to #6
#7 moves down to #16


and #17 moves up to #7
Then #8 moves down to #17
There we go! back to 4 on the top, and 4 on the bottom! But wait, we started with 6 on the top, and 4 on the bottom...


So you take e and move it up to #8
And E and move it up to #3, and voila! We are back to 6 across the top, and 4 across the the bottom! To make the flat braid flat, you need even tension as you are weaving, and to repeat the steps. Each set of steps that you do will make one more level of the braid.

This is what the braid looks like after a few passes around the disk. Despite even tension, it is still a little wobbly, because of the fact that the hemp thread is thinner than the ribbon.
I love braiding, I hope that this was helpful to someone!
B
Thanks for this tutorial! I'm excited to try it out!
ReplyDeleteHello B, THX A LT for this tutorial. Pls explain me this: at the end of the kumihimo braiding do you make just a simple knot? If you don't, won't it become loose?
ReplyDeleteThx again for your reaction. And I need to add that i find it very nicely done. THX!
That's a good question! I do a simple knot on both the loop end, where I hang my weight while braiding, and also on the finished end when I am done. However, when I am making it into something, I do a square knot or two and then trim.. or I bind them together with ribbon, cord, or thread, (and usually a little bit of glue) and then use a ribbon crimp (with the flat weaves) to finish it off.
DeleteI hope that helps!
Hi! I'm in Dawson. Where are you?
ReplyDeleteI'm in whitehorse! Hi! :D
Delete