I want to apologise to those who have been waiting for a new post.. you have been waiting a while! Life has settled down again (and most of my stock is now in the Itsy-Bitsy Yarn store store that is opening on tuesday) so I am back, blogging away about my passion.. wire :)
*** please pardon any formatting mistakes in my posts.. blogger doesn't seem to like me and doesn't even format correctly when I type out everything in html ***
I had a customer order a mini off of me a while back (oh how I love those customers who are willing to wait for my muse to do it's thing and allow me to follow) and I had started with her pick of amethyst.. trillion cut..


This was a perfect opportunity to practice my prong settings.. cause really with a faceted cut you want to get as much light coming into the thing as possible.


 Time to start on the weave.. this is 24g base wires with 32g weaving wires.

you can see the prong set trillion amethyst behind the weaving on this picture.
 Making sure the curve sits properly..
 now the figure 8 weave for shaping
 almost to the right spot.. and a swirl added
 I curled and tucked a couple behind, because the turquoise was a bead, and I don't want a bead to spin in it's setting.. at least not this time
 another couple of times around for the figure 8 weave to get it in the right spot, and then a coiled spiral was next
 Time to focus on the other side for a little while, so I made another figure 8 weave and twisted two of the wires together
 Loopdy loops are all over my work.. I love how they look! LOL
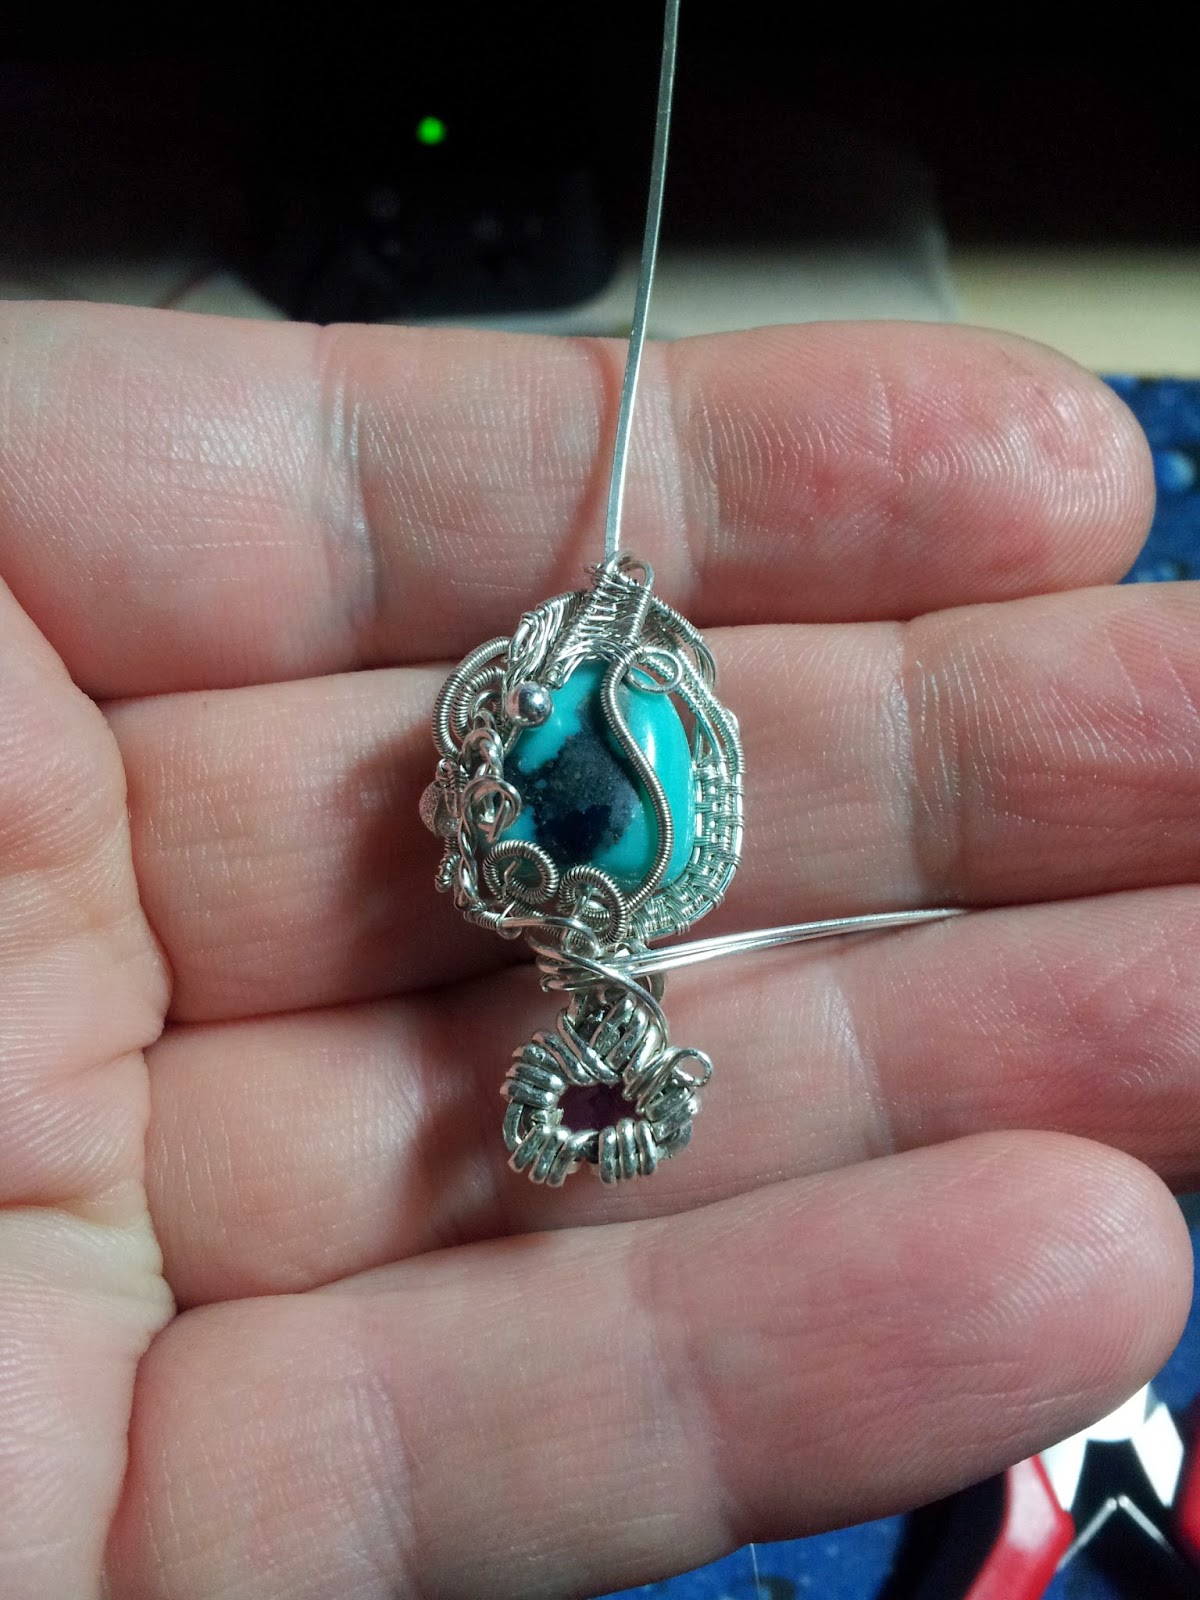
I coiled down one wire and attached it to the bottom, wrapping around the base wire, and put a silver bead on the other one. Then I coiled up the first wire a bit, and curled the end so the coil would stay nice and tight. At this point I had a few extra wires I had to figure out what to do with (I hate trimming).
I care as much about how the back looks as the front, and the prong setting on the amethyst is the only reason this pendant has a definable front and back.
Coiling, loopdy loops, and a few beads wired in, and this puppy is almost done.
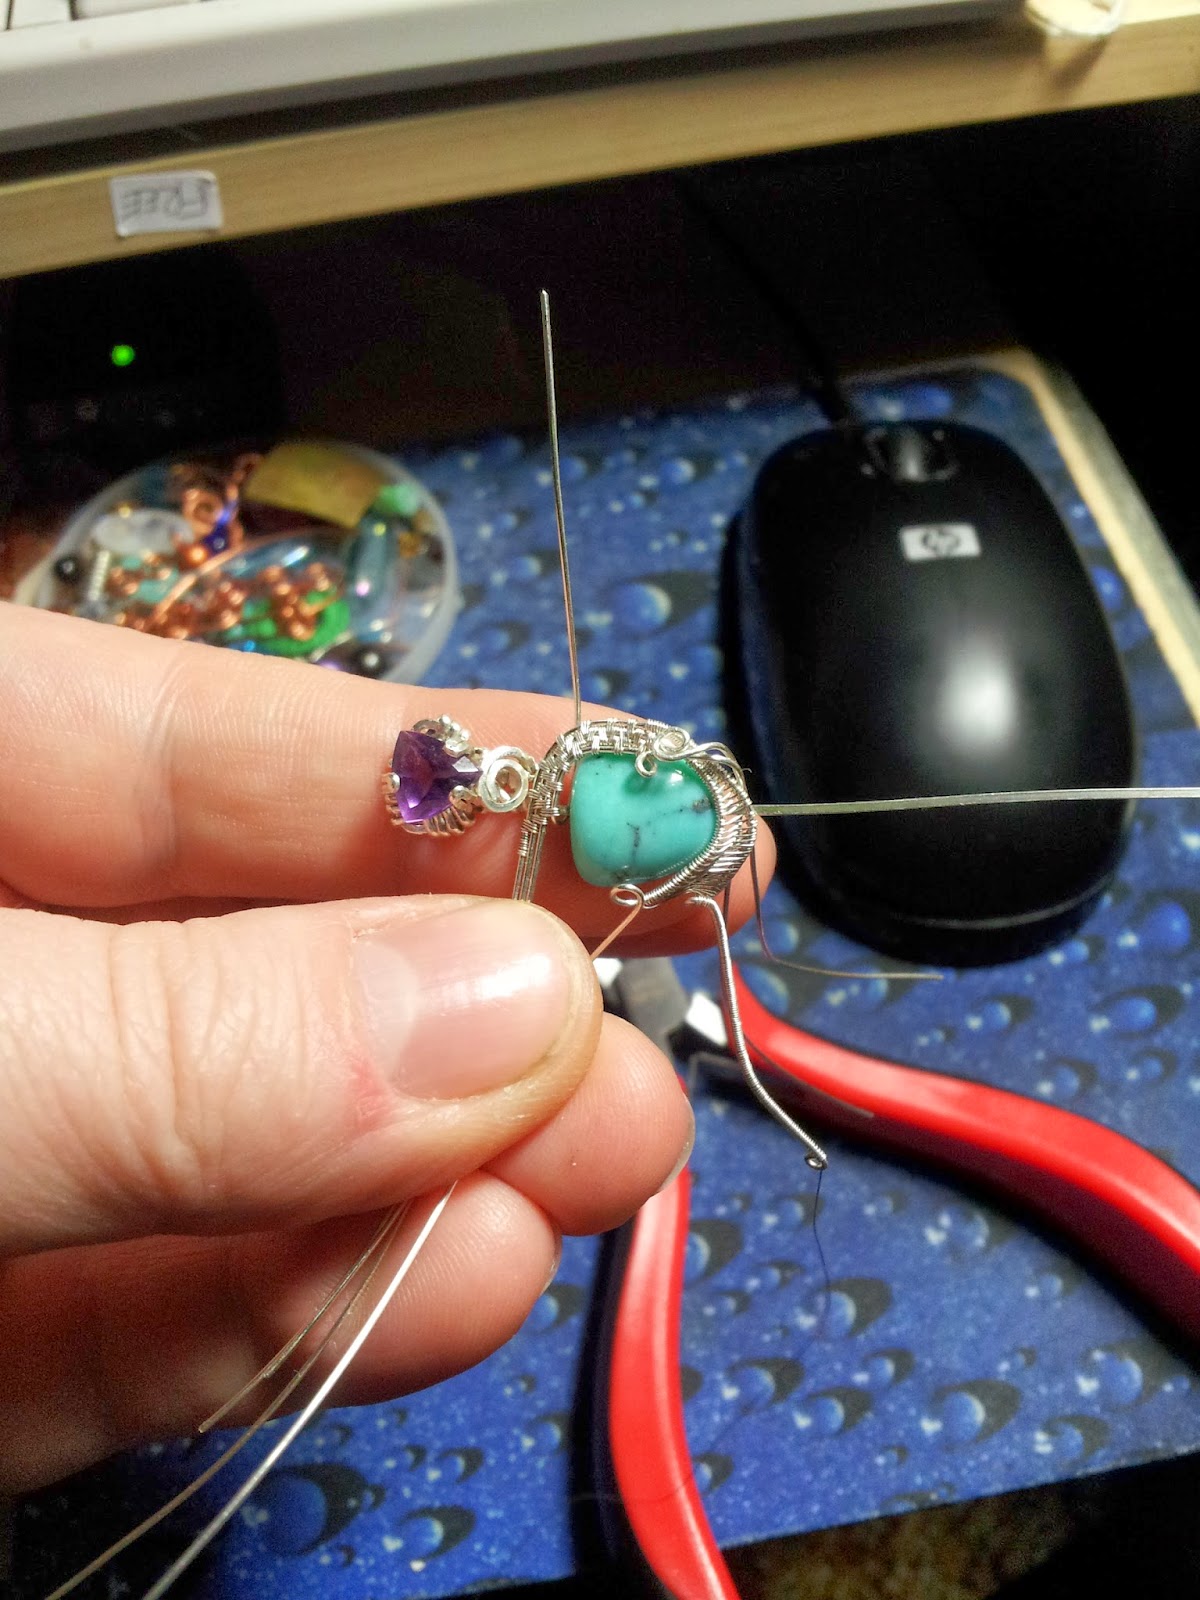
 those two wires have a purpose..

Part of the purpose was to add a ring at the top, but also to shore up the prongs as they were getting a little loose (and I didn't feel like making new ones at that point)


My first idea was to put a silver bead on the bottom, but the amethyst bead was a MUCH better choice.
Front and back shots
Thanks for reading!
B
*** please pardon any formatting mistakes in my posts.. blogger doesn't seem to like me and doesn't even format correctly when I type out everything in html ***
I had a customer order a mini off of me a while back (oh how I love those customers who are willing to wait for my muse to do it's thing and allow me to follow) and I had started with her pick of amethyst.. trillion cut..
This was a perfect opportunity to practice my prong settings.. cause really with a faceted cut you want to get as much light coming into the thing as possible.
Time to start on the weave.. this is 24g base wires with 32g weaving wires.you can see the prong set trillion amethyst behind the weaving on this picture.
I coiled down one wire and attached it to the bottom, wrapping around the base wire, and put a silver bead on the other one. Then I coiled up the first wire a bit, and curled the end so the coil would stay nice and tight. At this point I had a few extra wires I had to figure out what to do with (I hate trimming).
I care as much about how the back looks as the front, and the prong setting on the amethyst is the only reason this pendant has a definable front and back.
Coiling, loopdy loops, and a few beads wired in, and this puppy is almost done.
Part of the purpose was to add a ring at the top, but also to shore up the prongs as they were getting a little loose (and I didn't feel like making new ones at that point)
My first idea was to put a silver bead on the bottom, but the amethyst bead was a MUCH better choice.
Front and back shots
Thanks for reading!
B
Nice job!
ReplyDeleteNice work! It's nice to see the process.
ReplyDeleteThank you. :D
Delete